Anyway, I wanted a table to put it on. I'm sure I didn't even ask my parents to buy me a little table (I knew they wouldn't). But, sitting in our garage, there was an old wooden chair that may have once lived in my grandparents' kitchen. Its back support had broken off, and just one or two of the spindles was still attached to the seat. I decided to remove the spindles and make a table out of it. And then I painted it pink, Pepto pink. Same as the walls. I liked it.
That was my first memory of painting wood furniture. It was born out of necessity then, and reborn out of perceived necessity again about 10 years ago...I wanted cool decor and furniture, but I didn't want to spend buckets of money doing so (and I never had buckets to spend either). And, in the process, I discovered that I love, love, love searching for, buying, sanding, painting and sealing other people's old junk furniture =) Finally, a hobby! And a practical one that suits my practical nature to boot!
Recently, I bought a $40 dresser (to be shown in a later post) that was probably made in the 1960's. Solid wood. Dove tail joints on all of the drawers. It had a couple of scratches and the drawers were lined with Raggedy Ann & Raggedy Andy contact papers. I painted it lavender, then decided it was way too bright. I decided to try a new technique, similar to white washing. I grey washed over the lavender. I loved it, and so did my daughter (6). I wanted to sell the dresser and get some cash to spend on more junk treasures. Miss Belle lobbied to make it hers. We had to make a deal: if the dresser didn't sell by the end of the following weekend, it was hers.
No one bought it. It only took one more entire week, but the Mr. and I hauled it up to Miss Belle's room. She was delighted! I wished I had a couple hundred bucks in my pocked instead, but it was great to see her excitement too.
That very night...I got a very enthusiastic buyer for the lavender grey-washed dresser. Damn! It was no small task getting that thing up all of the stairs. And, I couldn't possibly disappoint Miss Belle. I had to tell the interested party that it was gone.
Then I had a great idea! I could take a chance and offer to find her another dresser and fix it up for her. Surprisingly, she was totally into the idea! She didn't want to buy a "new" piece, and she was willing to wait for the right dresser to come along and get all prettied up. My first "custom" piece!!!
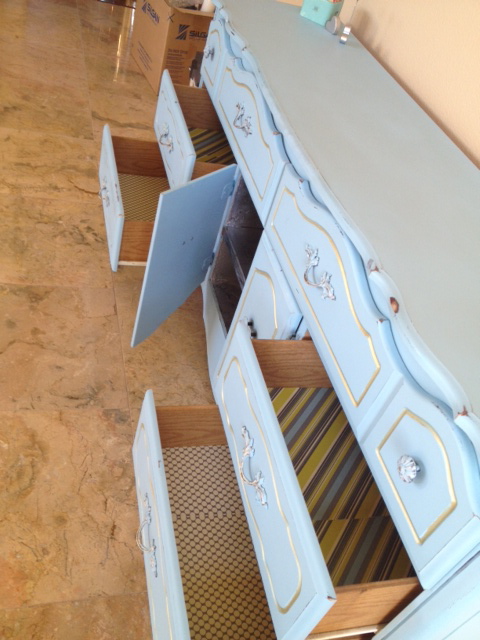
Hooray! So, I drove out to Oakland and picked this baby up for a very, very small amount of money from a nice lady who was moving to the East Coast with her 3 year old son.
I fixed her up, and here she is...see below to find out what I did to achieve this aged look (inspired by Restoration Hardware).


Then, I took a little bit of grey/gray paint (free oops paint samples) and mixed it with water. It was close to 1/3 paint, 2/3 water. But, honestly, I just added water until it seemed like I could spread it on and wipe it off without removing all of the color. Then I painted the mixture on, let it sit for a minute or two and wiped it off with a cloth (diaper). Then I decided that I liked how it looked when I wiped the dresser back and forth with the cloth I had used to wipe the diluted paint off with. I did this, let the coat dry for a day, then did another coat or so until I liked the way it looked. I wanted to leave a little of the natural wood color showing. Then voila! I achieved what looked to me like the Restoration Hardware weathered/reclaimed wood look.
I let it dry for a few days. Then I added a coat of wax with a brush, let it sit for 5 minutes and then buffed it with a cloth. After awhile it occurred to me that some nice paper in the drawers would make it special. Hello pretty scrapbook paper! I sprayed the back of the paper with spray adhesive and stuck it in the drawers. The buyer absolutely loved it, and so did I!
And, it felt pretty cool to custom finish a dresser for someone too. Yay! Can I make a few nickles upcycling and refinishing furniture while relieving my husband of his ongoing fear that our home will be overtaken by a growing furniture collection/warehouse?